Operations on repositories
Create a mirror repository
From the REPOSITORIES tab:
Step 1: You must first add one or more source repositories to mirror from. See Source repositories.
Step 2: Click the Create a new repository button to show the NEW REPOSITORY panel.
Step 3: Select mirror as the repository type then complete all the required fields.
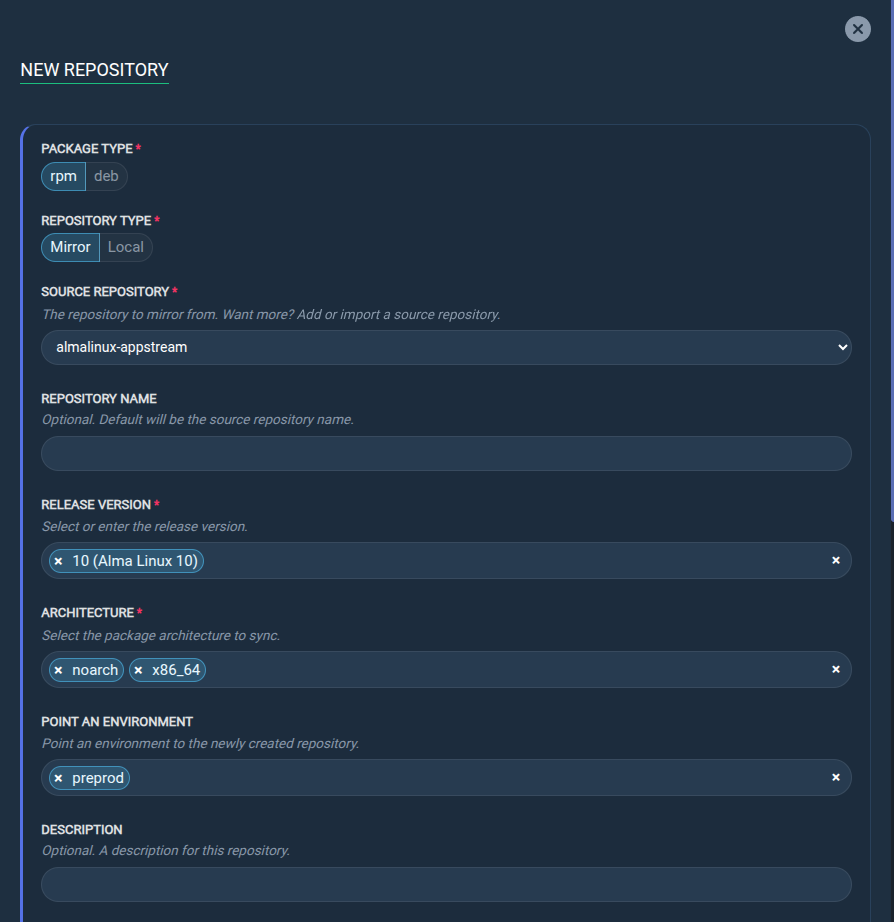
Step 4: Click the Execute now button to launch the mirroring task.
Info
The REPOSITORY NAME field is optional. If none is specified, the repository will have the same name as the source repository (e.g., if the source repository is named nginx, then the mirror repository will also be named nginx).
Create a local repository
From the REPOSITORIES tab:
Step 1: Click the Create a new repository button to show the NEW REPOSITORY panel.
Step 2: Select local as the repository type then complete all the required fields.
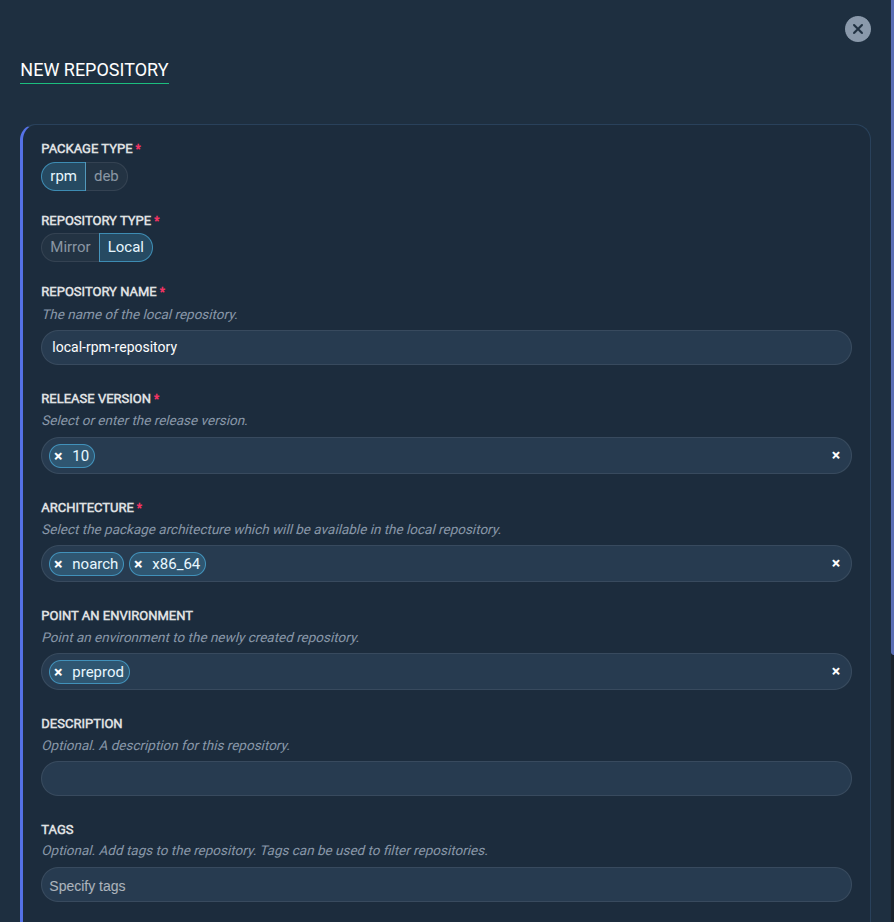
Step 3: Click the Execute now button to launch the repository creation task.
Info
Local repositories are always empty when created. You must then add your own rpm or deb packages by uploading them. See Upload package(s) in a repository.
Update an existing mirror repository
From the REPOSITORIES tab:
Step 1: Select the repository snapshot from which you want to update the mirror.
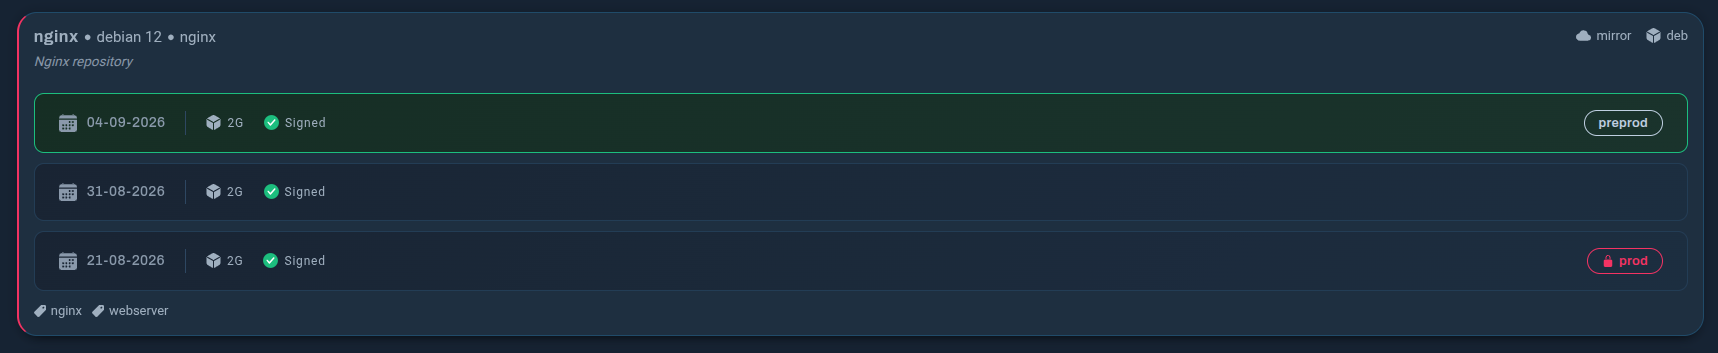
Step 2: Click the Update button.
Step 3: Specify the mirroring parameters.
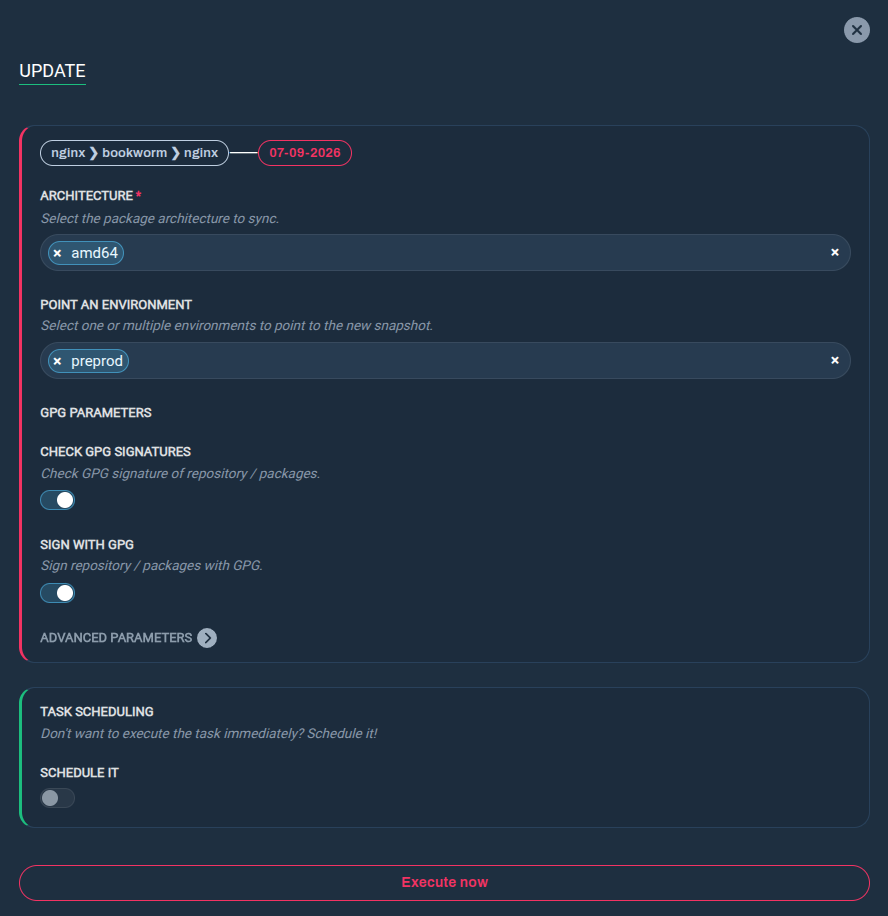
Step 4: Click the Execute now button to launch the mirroring task.
Point an environment to a repository
From the REPOSITORIES tab:
Step 1: Select the repository snapshot you want to point an environment to.
Step 2: Click the Point an environment button.
Step 3: Specify the environment that will point to the snapshot.
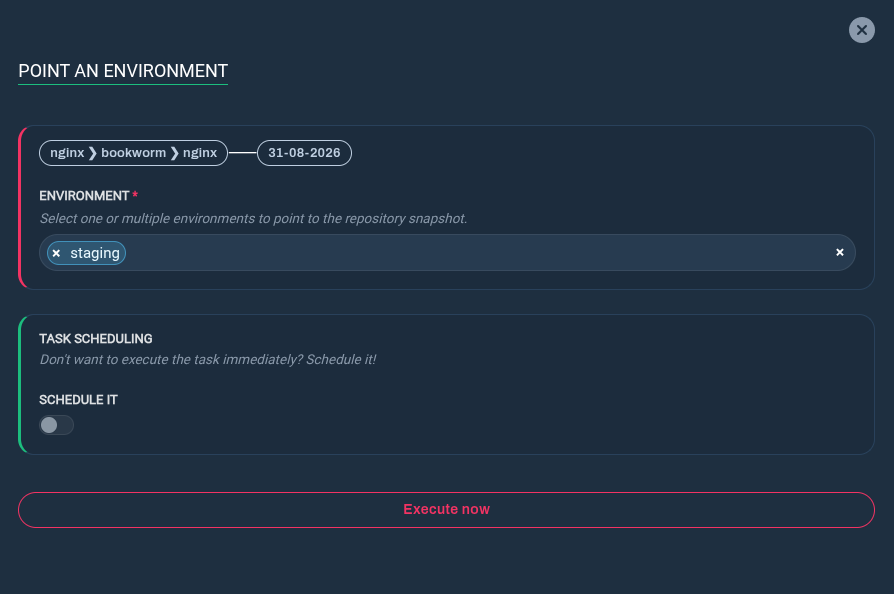
Step 4: Click the Execute now button to launch the task.
Info
A protected environment cannot be pointed to a repository snapshot.
Remove an environment from a repository
From the REPOSITORIES tab:
Step 1: Select the environment you want to remove from a repository snapshot.
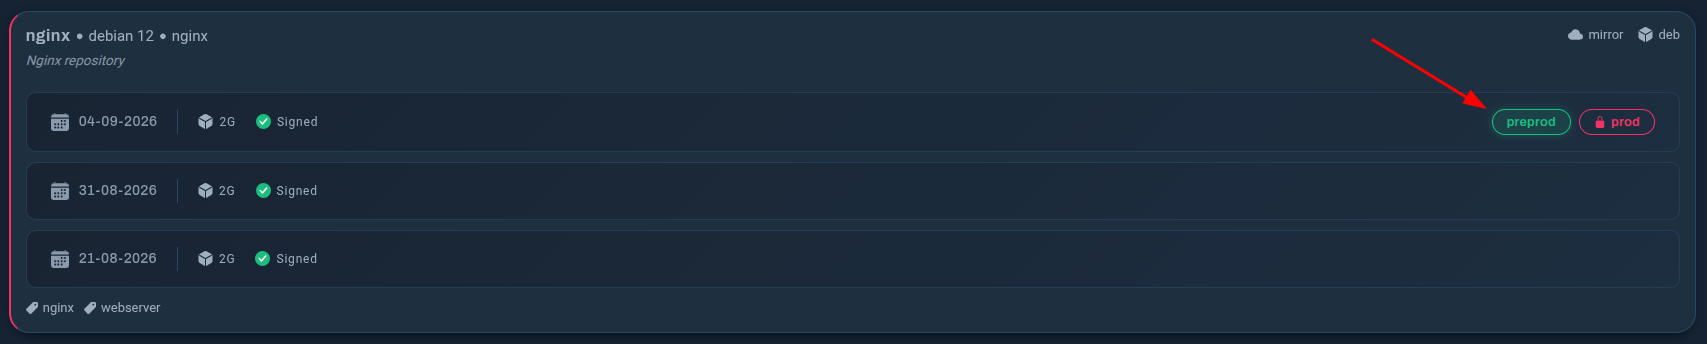
Step 2: Click the Remove button.
Info
A protected environment cannot be removed from a repository snapshot.
Duplicate a repository
From the REPOSITORIES tab:
Step 1: Select the repository snapshot you want to duplicate.
Step 2: Click the Duplicate button.
Step 3: Specify the name of the new repository that will be created from the selected repository snapshot.
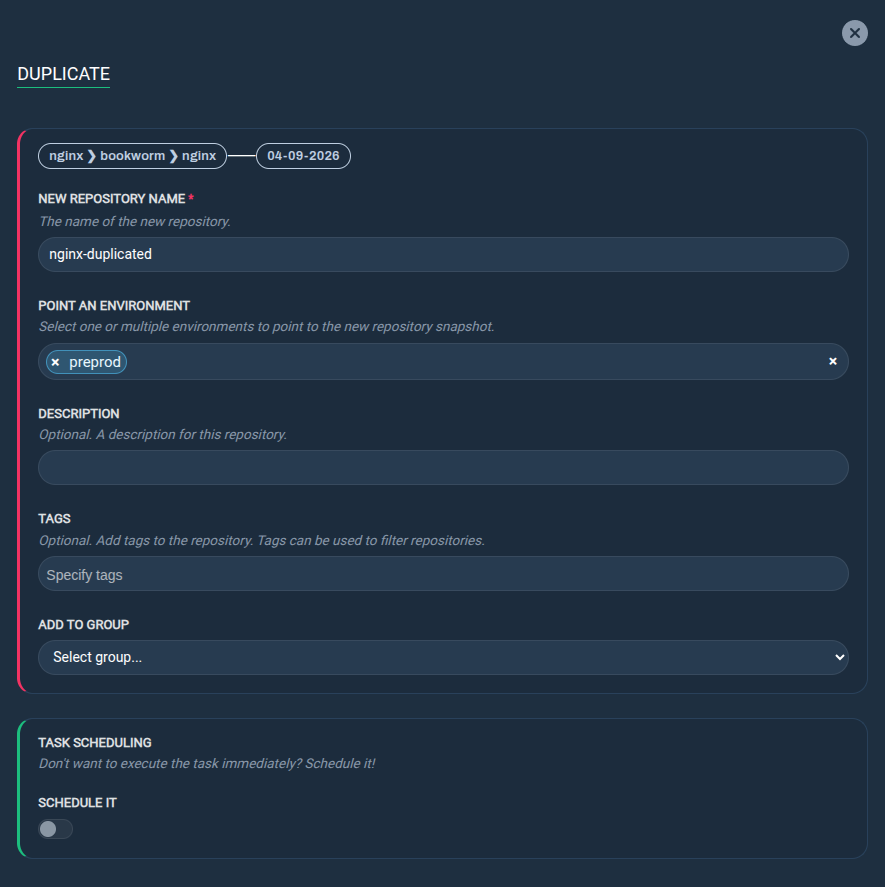
Step 4: Click the Execute now button to launch the duplication task.
Delete a repository snapshot
From the REPOSITORIES tab:
Step 1: Select the repository snapshot you want to delete.
Step 2: Click the Delete button.
Step 3: Click the Execute now button to launch the deletion task.
Info
A snapshot having a protected environment cannot be deleted.
Browse repository content
From the REPOSITORIES tab:
Step 1: Locate the repository snapshot you want to explore.
Step 2: Click on the snapshot date to browse its content.

Upload package(s) in a repository
From the REPOSITORIES tab:
Step 1: Locate the repository snapshot in which you want to upload package(s).
Step 2: Click on the snapshot date to browse its content.
Step 3: Click on the Upload packages button to open the UPLOAD PACKAGES panel.

Step 4: Select the packages from your local computer and click the Upload package(s) button to upload.
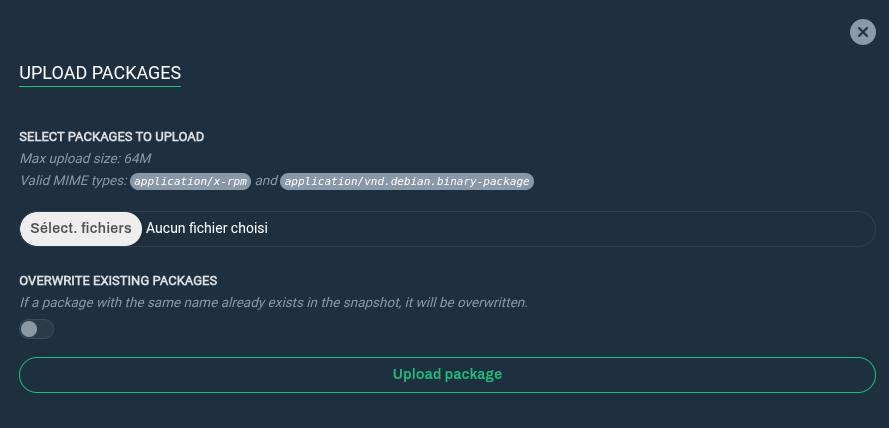
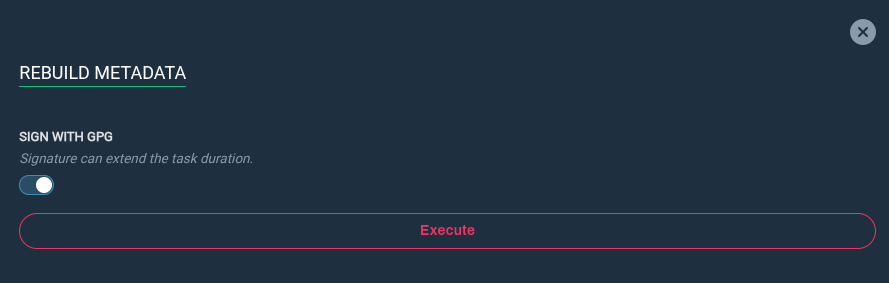
Step 5: To take the new package(s) into account and make them visible from clients, click on the Rebuild metadata button to open the REBUILD METADATA panel.

Step 6: Choose whether to sign the repository metadata if required, then click the Execute button to launch the rebuild process.
Info
- If you need to increase the maximum upload size, consider increasing the
MAX_UPLOAD_SIZEvalue when pulling the docker image (see Prepare the environment variables). - A
.debpackage must contain the architecture in its name (e.g.nginx_1.23.3-1_amd64.deb) otherwise it will not be recognized as a valid package.
Valid architectures are:amd64,arm64,armel,armhf,i386,mips,mips64el,mipsel,ppc64el,s390xandall. - A snapshot having a protected environment cannot be modified.
Delete package(s) from a repository
From the REPOSITORIES tab:
Step 1: Locate the repository snapshot in which you want to delete package(s).
Step 2: Click on the snapshot date to browse its content.
Step 3: Use the package dropdown list to search for the package(s) you need to delete, then use the checkbox to select them.
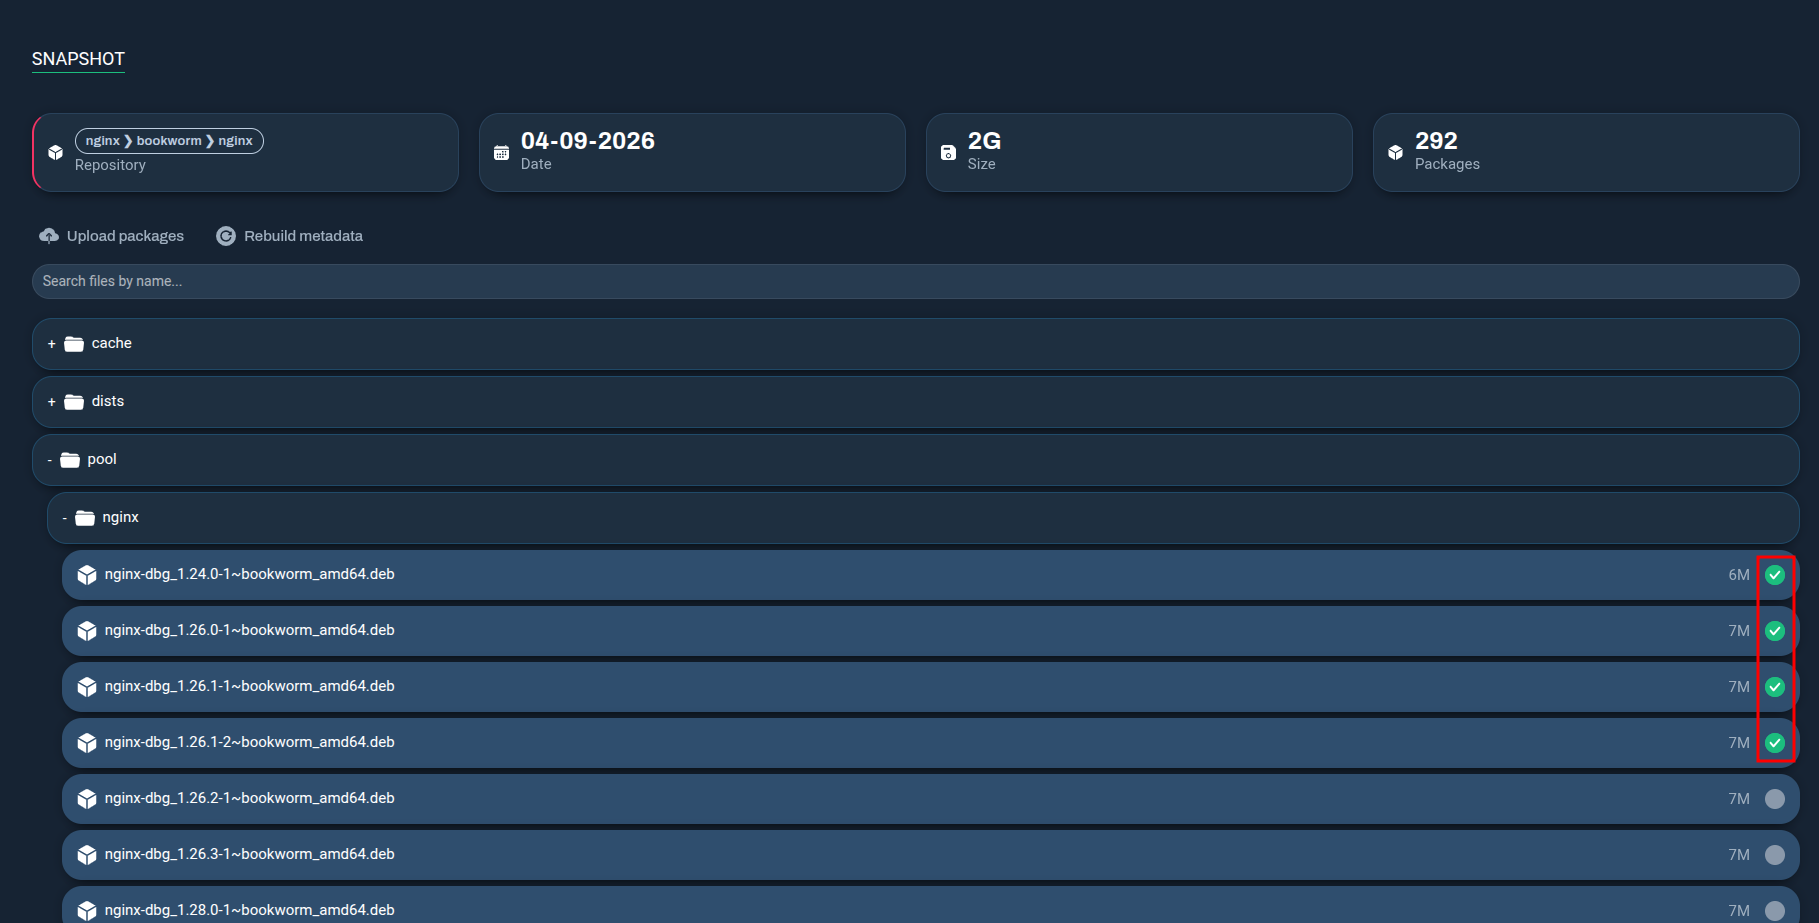
Step 4: Click the Delete button to delete the selected packages.
Step 5: To take the changes into account, click on the Rebuild metadata button to open the REBUILD METADATA panel.
Step 6: Choose whether to sign the repository metadata if required, then click the Execute button to launch the rebuild process.
Info
A snapshot having a protected environment cannot be modified.
Rebuild repository metadata
From the REPOSITORIES tab:
Step 1: Select the repository snapshot you wish to rebuild.
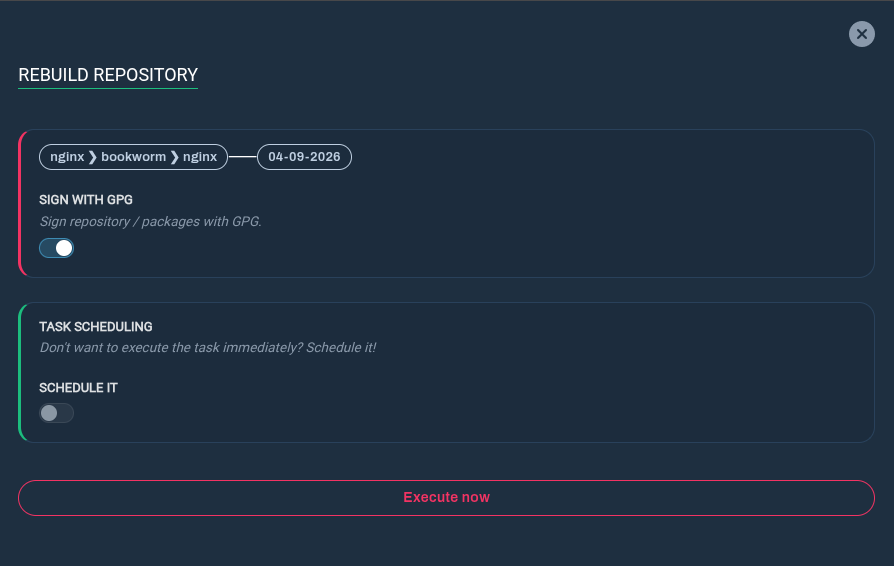
Step 2: Click the Rebuild button.
Step 3: Choose whether to sign the repository metadata if required. Click the Execute now button to launch the metadata rebuilding task.
Info
A snapshot having a protected environment cannot be rebuilt.
Install a repository on a client
Once a repository has been created, you can install it on a client to make it available for package installation.
From the REPOSITORIES tab:
Step 1: Select the repository snapshot you wish to install.
Step 2: Click the Install button.
Step 3: Specify an environment to generate the installation command lines for.
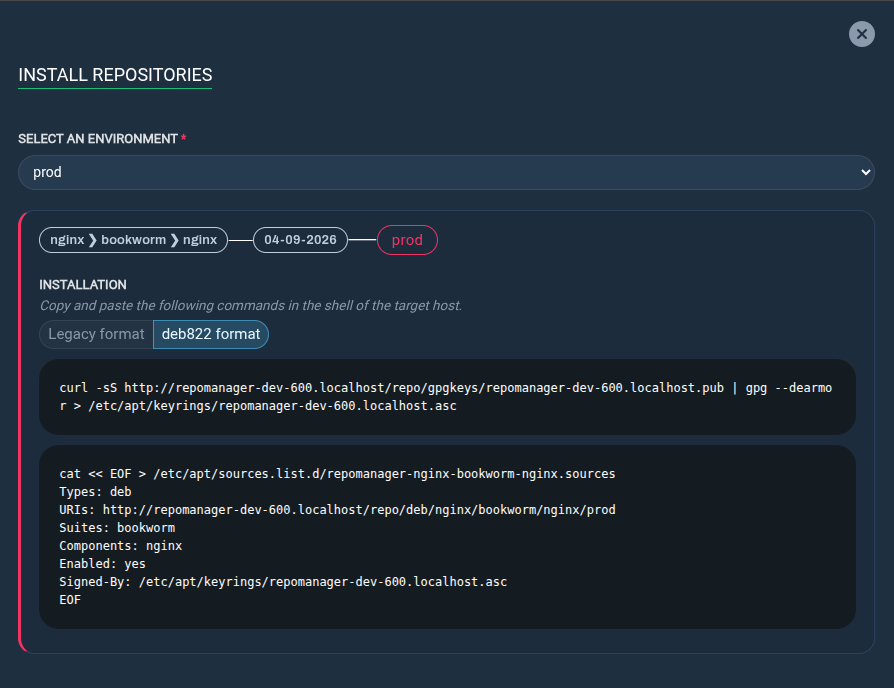
Step 4: Copy the command lines and paste them into your client terminal console.